Past Blog Posts:
2 Tomb Shrines & The Charnel House PLUS New Halloween Sale!
Filed under Edgar Allan Poe, Halloween, Laura Carson, Marie Antoinette, Miniature Reliquaries Kit, Shannon Cooper
 New art, new goodies! It’s almost October (can you believe it?) so I’ve added a NEW Collage Sheet Sale and a new FREE Gift, both with October in mind!
ALL Halloween Collage Sheets are 40% off — through FRIDAY night (September 30, 2016)! WOW! That’s a huge section (148 sheets) so grab all those spooky witches, goblins and skeletons you need right now for Halloween projects! Includes popular items like the Witchy Little Labels & Ephemera and Spooky Windows Collage Sheets shown at right.
 NEW Fuzzy Fall Fiber Set FREE Gift! In honor of autumn, just around the corner, I’ve made up little gift sets from the same fibers in this beautiful new Fuzzy Fall Fiber Set! Nice! A new set of soft, fuzzy fibers, just in time for Halloween or all fall/harvesty projects. This set is less black, more tan than the Halloween Fiber Set (but still includes lots of green, orange and purple). These sets are FREE for ALL orders, now through TUESDAY NIGHT, September 27, 2016!

Once again, Design Team Member Laura Carson
does not disappoint! She has made two tombs (shrines really):
These tombs are my memoriam to Edgar Allan Poe and Marie Antoinette; both gothic, one darker and serious and the other humorous.
With Poe I featured images of people and animals from his literature. For Marie, I decided to feature her head, which under the circumstances I thought was appropriate. I envisioned her with gothic makeup and a crazy hairdo made from cotton balls.
 I pulled cotton balls apart in long sections. Next, I glued the sections to her paper hair until I felt like it was full enough. It would be easy to shape it into a pouf or any other style you might like.
Be sure to read more on Laura’s blog post. I think the dyed purple cheesecloth draped behind the oval portrait frame adds the perfect contrast to this subtly colored piece.
 Moving on to Poe… sigh. Laura, this is such a beautiful shrine! Beside his beloved, Annabelle Lee, see the wide photos below for the full effect with all of the pieces together.
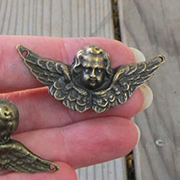 A pretty and easy addition to the Annabelle Lee reliquary is the new Cherub Pendant. I’m sure these pendants will be handy for Christmas projects, too.
I dressed up the top with tea dyed
cheese cloth and flanking each side of the pediment are angels from the Facade Architecture Collage Sheet. The picture of Poe comes from the the Just Poe Collage Sheet and the frame is from the Ghostmore Image Set. At the bottom is a fence made from a Chipboard Gothic Border Trim and painted black. Behind the fence is a piece of Baroque Black Dresden.
Read more step-by-step instructions, and see more photos in Laura’s blog post, and see her full Supply Lists: Edgar Allan Poe Tomb and Marie Antoinette Tomb.
 |

Wow! Next up is The Charnel House by Design Team Member Shannon Cooper, a spooky Halloween book made from the chipboard tombs (and a lot of other goodies). Beside that fun collage at left, see the wide photo below, too. I love all the texture on these pages. The scrapbook papers from the Miniature Reliquaries Kit are a good start (like the Ancient Stucco Scrapbook Paper in the background at left), then Shannon built up layers of collage sheet images, die-cut chipboard pieces, charms, watercolor pencils, stamps, Dresden trim, markers, paint, and ink.
 I bet you didn’t recognize the children from the Little Imps Collage Sheet as those creepy kids at left!
“These tiny ghouls are ready for some devilment, don’t you think? They are a little more frightening with stringy hair and bloodshot eyes, made from a bit of fiber and shimmering red Stickles. Again I chopped off parts of some collage images and added others; so many parts, so little time (before Hallowe’en is here)!”
And the stamps from the 4 Halloween Corners Cling Stamp Set were used all over the place, to add texture and shadows.
Good job, Shannon! Read more, and see more photos on Shannon’s blog post, and see her full Supply List. Psst! Check below, too, ’cause tons of goodies from Shannon’s supply list are included in today’s GIVEAWAY!
 |
Highlights of Today’s New Goodies – ALL on Sale! View All (lots more to see!) |
|||
 Cast Metal Skull – White |
 Metal Flying Witch & Moon* |
 Brass Door Handle and Key Sets |
 Mini Brass Door Handles |
 Fancy Looped Gold Filigree Base |
 Glass Bulb Shaped Bottle |
 Large Amber Onion Jar |
 Verdigris Winged Pendant |

Hooray for the The Charnel House Giveaway!
I picked out a bunch of supplies used in Shannon’s artwork to include in today’s Giveaway:
– Gothic Arch Tomb
– Creepy Tree – 5 Inch
– Lock Spiders – Set of 3 (see how Shannon used it in the tomb window?)
– 4 Halloween Corners Cling Stamp Set
– Ancient Stucco Scrapbook Paper
– Black Dresden Border Sampler Set
– Little Imps Collage Sheet
– German Expressionist Horror Collage Sheet
– Poe Story Elements Collage Sheet
 Just click on this Supply List link for photos and links to everything in Shannon’s artwork, including all of the Giveaway items listed above!
Bonus: see those 3 scrapbook papers at the bottom of the photo at right? I’m included those, too! They were announced last Thursday and I think they look great together (and for Halloween): Black Woodgrain Scrapbook Paper, Mysterious Skeleton Damask Scrapbook Paper and Barber Shoppe Razor Scrapbook Paper.
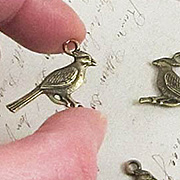
AND as I’ve just put them on Clearance Sale: One of the Bronze Bird on Branch Charm! Check out some other birds just put on clearance.
 To enter the The Charnel House Giveaway drawing all you have to do is leave a comment BELOW on this blog post TODAY OR TOMORROW (the deadline is 11:59 pm PST, MONDAY NIGHT, September 26, 2016). And tell me: How would you build up texture on your chipboard tombs? Shannon used watercolor pencils, stamps, Dresden trim, markers, paint, and ink (beyond flat papers)…
Don’t forget to leave your (hello! correct) email address, too, so I can contact the winner; your email address does not need to be made public. Note: I’m offering free shipping, too, but only within the USA. International shipping will still apply.
Please be patient! Spammers try to post crap here a lot so comments are moderated. So if you don’t see your post in the comments section, be patient and check back in a few hours before re-posting it, please!
After midnight, I’ll randomly pick the winner (via Random.org). So check your mailbox on Thursday morning to see who won and for the next Giveaway and Newsletter!
Hey, who won The Hanging Tree Tunnel Book Giveaway? That would be Jackie PN! Congratulations! Check your email for more info
I use napkins, tiny beads….this would be a good project to learn new ways! Thanks for the giveaway. What could be better than these lovely womens fun inspiration!
I love these ! I would use Dresden trim, paint,paper,glue & spooky embellishments to add texture to the chipboard tombs!
Layers, stencils and modeling paste oh my!
I like Whipped Spackle. And then layer inks or thinned acrylics on it
Sand, glitter, a variety of spray colors, fairy dust mica powder, layers and layers of Dresden trims. Lace… lots and lots of lace.
I would use cheesecloth for sure along with some spray ink – purple and orange from Ranger.
Wow – they are all imaginatively creepy! Snow-tex or spackle would give it a great rough surface, and tiny raised letters and numbers would be great for adding names and dates.
I like to use layers of metal and plaster embellishments with distress or crackle paint.
Paint, scrunched up tissue paper, blk glossy paint, and spray glimmer paints
I would use black gesso to paint the tombstones and then build it up and make it uneven, add a lot of halloweeen items on top and add a couple ghouls on the front.
I’d use a combination of acrylic paint, Dresden or other textured trims,textured medium, and embossing powder with stamps to build texture on the tombs.
So creative!! I would use texture paste and stencils to create more texture on the tombs!
Wow! Those tombstones are amazing! I love the texture and all the little details.
Congratulations Jackie! Enjoy your goodies!
I would build up texture using embossing paste, modeling pastes, clay, paints and embossing powders! Lots and lots of chipboard embellishments and charms would also build even more depth!!
macaskillbarbara @yahoo .com
I like to use stencils and Media paste with cheesecloth.
I would use some embossed papers along with some stencils and modeling paste.
I think I’d use some gesso and some embossing paste along with some cheesecloth!
Gesso, grey cheese cloth, distress inks and feathers! I love Halloween!
I would love to win this I love Halloween Thanks I would make a scary tombstone
Thank you for this opportunity to win fabulous products. I would use Texture paste, Distress glitter, tissue paper, beads, paint and gauze
Maybe build up some extra layers with tissue and spray it with the stone paint Laura used to such good effect. I also like her idea of dribbling wax and stained cheesecloth. And throw in some moss.
Love the textures!! So many choices! I love the look of real wood & use wood coffee stirs to use for walls & flooring! Sand makes good concrete texture! So many get great ideas !!
Love the tombstones-Laura’s projects are always amazing. Love trying her ideas. >^..^<
I like cheesecloth, tissue paper, mod podge mixed with sand or glitter, and of course metal and plastic embellishments.
I would use cheese cloth for a spider web effect and sculpting paste. Oh the possibilities.
Just love all the painting tips and techniques!
Thanks for more great inspiration! I use modeling paste and gesso for texture, but crumpled pare may work well here too
Love the projects today! I would use some texture paste and stencils to build up base layers!
I would use texturing paste, paints, stains, stamps, pix, and anything else I can think of.
I would add some air dry clay and paint and then glue a lot of stuff on.
I’d use crackle paint to make them eerie.
I would use the new paints by Folk Art that replicates concrete to bring the borders alive, and then use multiple layers of collage sheet images embossing certain elements of the design with black embossing powder.
Love the paint job on marie’s face! I think I would add a skirt!
I have use spackling paste in the past to add texture.
Mulberry paper for texture maybe? It would be impossible to improve on this Giveaway, though.
I would use stone spray and cheesecloth or maybe a tissue paper technique. I love to see what inspiration has in store!
Love that scary tree cut out! And I would use some of the sprays that Laura Carson used!
I would use tissue paper and gesso. Love the Halloween theme!
Thank you oh Random picker!!
Thank you barb Macaskill for the wishes!
I LOVE texture, so the more the better! Probably starting with shredded paper,adding some sand paste,and maybe modeling paste or even some embossing! More more more!thats how i like it!
I mix sand into acrylic paint or use pieces of Kleenex and dab them on with acrylic paint. Also use acrylic paint from a tube to get texture
I would use crackle paint to make them looked decayed and glitter because I love it.
I love it!
I would use some chalk to add some texture and then I would try a new paint technique I learned at a workshop. Halloween is the absolute best time to create!!!
I like to use sprays, then follow with stamping, paint, and lots of embellishments. I don’t like any of the base showing.
To build up texture on tombstones I’d use speckle paste with stencils and color, maybe tissue or deli paper added here and there. You know – all the usual haunts!👻
I would use some textured paint and tissue paper and mix some metallic sprays to make it look old and rustic .