Past Blog Posts:
Haunted House Tutorial
Filed under Art Projects, Design Team, Halloween, Tutorials
Materials:
- Chipboard House
- “Shutter Speed” Paper
- “Love Letters” Paper (Part of the “Botanicabella” Paper Set)
- Polka-Dotted Paper
- Tintypes Collage Sheet
- Skeleton Slides Collage Sheet
- Black Baroque Dresden
- Random Text Stamp
- Optical Lens
- Bug or Spider Charm
- E6000
- Nailhead Stickers
- Hook and Eye Set
- Old Bingo Card (or Reproduction Bingo Cards from Vintage Die-Cut Ephemera or Cut & Paste Die-Cut Ephemera Sets)
Directions:
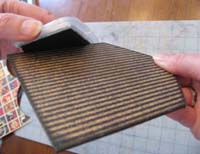 1. Cover entire house with the striped side of “Shutter Speed” scrapbook paper. Using an old ink pad, ink the edges.
 2. Cover the roof of the house with polka-dotted paper and ink those edges as well. Stamp the left edge of the house with a swirly stamp.
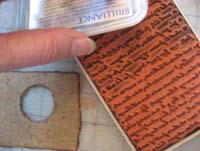
3. Ink around the edges of a brown paper scrap and stamp with a part of the text stamp.
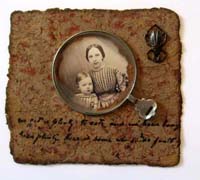 4. Glue image from the Tintypes collage sheet onto the back of the brown paper so that the image shows through the hole. Glue a bug or spider charm to the corner and an optical lens over the tintype image using E6000 glue.
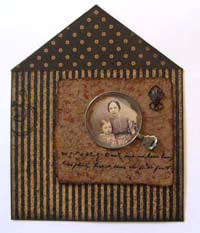
5. Glue the brown paper section to the front of the house.
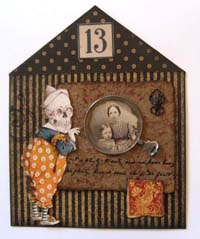 6. Carefully trim out the clown skeleton from the Skeleton Slides collage sheet and glue in place. Tear out a “stamp” from the “Love Letters” scrapbook paper and ink around its edges. Glue in lower right corner of the house. Cut out a number from an old bingo card and glue in position on the roof of the house.
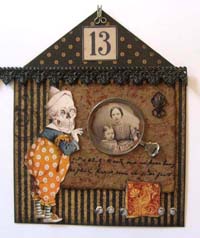 7. Add a hook from a hook and eye set to the apex of the roof, and attach 5 nailhead stickers to the bottom right corner near the stamp image. Glue Dresden border along the bottom of the roof line.
8. Trim the Dresden to fit, and voila!
More photos are in the gallery.


Hi!
Today I posted an entry on my blog with a link to this tutorial.
Would you let me know if that’s OK?
Thanks,
Nancy Ward
http://paperfriendly.blogspot.com