Past Blog Posts:
Wrapped Loop Tutorial
Filed under Art Projects, Jewelry, Tutorials
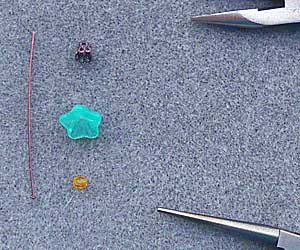 by Teri Calia
Supply List
- Head Pin
- Bead (1 or more)
- Bead Cap (optional, but looks pretty!)
- Round Nose Pliers
- Chain Nose Pliers
Have you always wanted to make a pretty wrapped loop on the end of a head pin? You might think it’s a hard thing to do, but it’s really quite simple. Let me show you how it’s done . . .
Instructions:
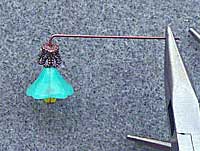
 Choose your beads, I have chosen to use a 4mm rondelle (or you can use one of these 4mm round beads), a large trumpet flower and a bead cap, and thread them onto your head pin. Next you will bend the head pin 90 degrees (about 5 mm) above your beads, using your round nose pliers. Once you have done this, wrap the long “tail” of your head pin over the top of the pliers to create the first half of a loop. You will then turn the loop part so it sits in between the jaws of your round nose pliers so you can complete the loop.
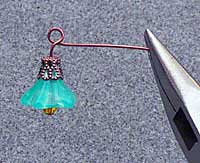 Next you will grip the loop in the jaws of your round nose pliers and using your chain nose pliers you will start to wrap the long “tail” around the head pin. You will do this until all of the “tail” is wrapped around the head pin. If, by chance, you cannot wrap all of the tail around the head pin just cut the excess off with a pair of flush cutters.
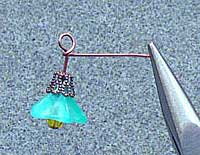 That’s all there is to it, now wasn’t that easy? They do look much prettier than plain loops too!
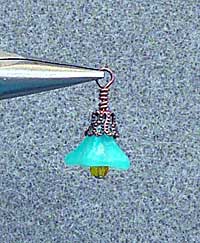 Note: You can use this wrap technique on eye pins also, just remember the “eye” end will not have a wrapped loop but a plain one or you can make your own eye pins with pretty wrapping on both ends by using wire, like our Vintage Bronze Wire.

Thank you for posting this tut. I am learning the art of jewelry and this is very helpful!
Hi!
Wanted you to know I posted a link to this tutorial today on my blog, PaperFriendly.
Nancy Ward
PaperFriendly
http://www.nancywardcrafts.com